|
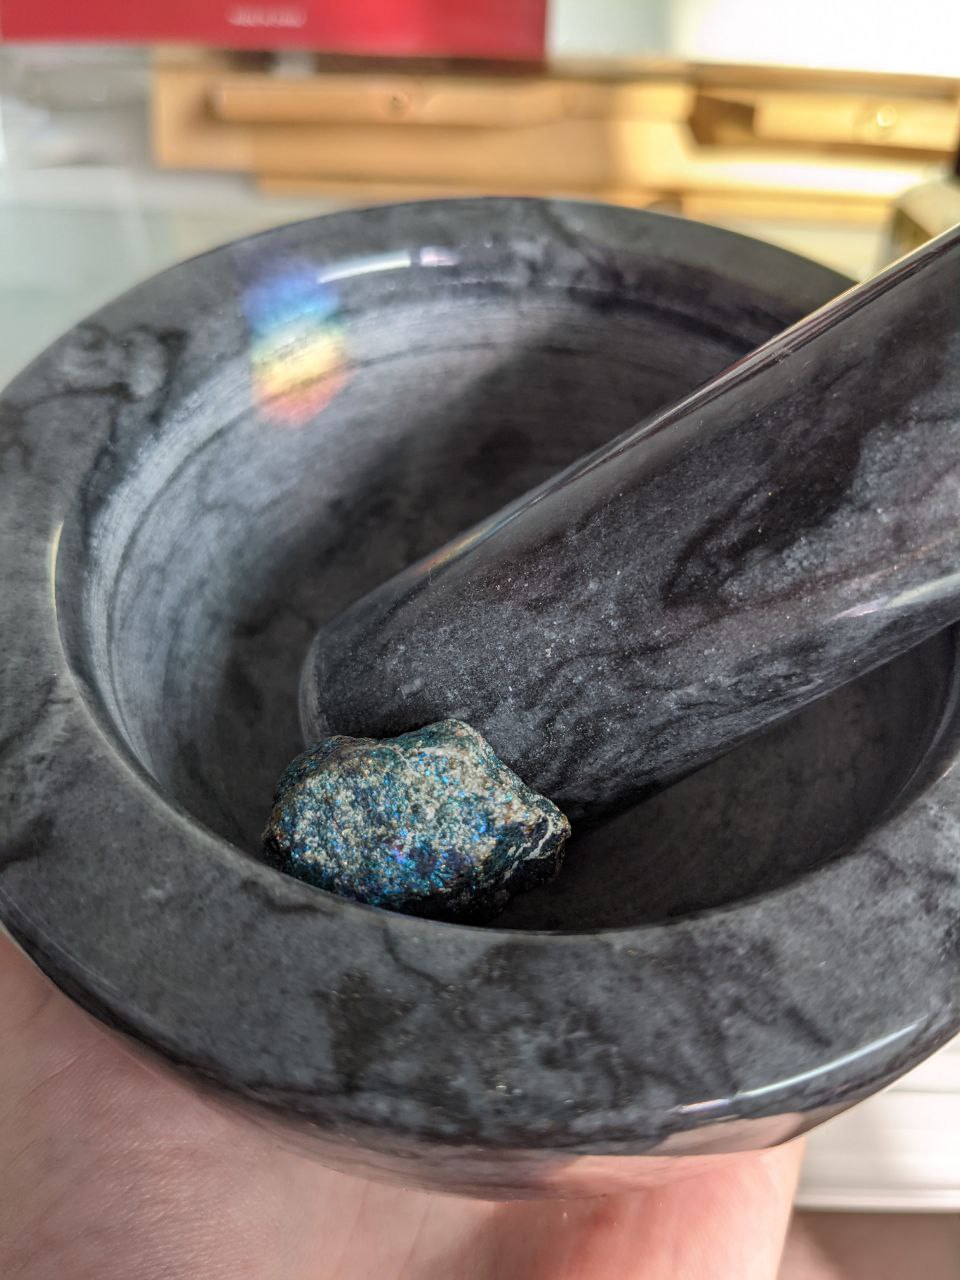
Long have I enjoyed the process and workings of turning found materials into art materials. A fun, hands-on way to interact with the natural world and alter a substance to then later use, paint making has called to my heart for years. Here is just one of the paints I have made from a natural specimen (in this case, Peacock Ore), and the process that went into it. I hope it inspires you to try, or even evokes a new appreciation for my work! 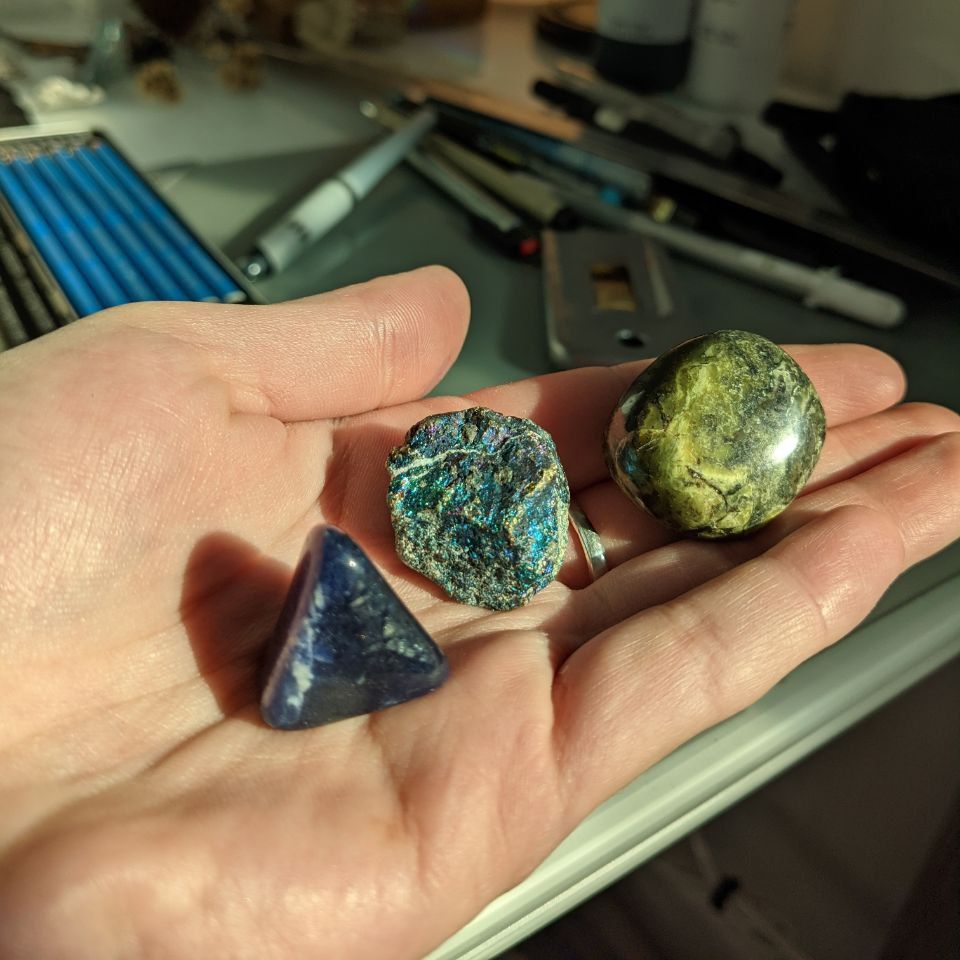 While some of my paint making expiriments have come from found rocks or even dirt, this particular experiment came from some bought rocks. I loved the way the peacock ore glinted and shimmered in the light, and I just had to know how this specimen would translate as a pigment. Once I selected my victim, I hopped right to making a binder (the additive that controls how the pigment reacts with a substrate, and ensures adhesion). 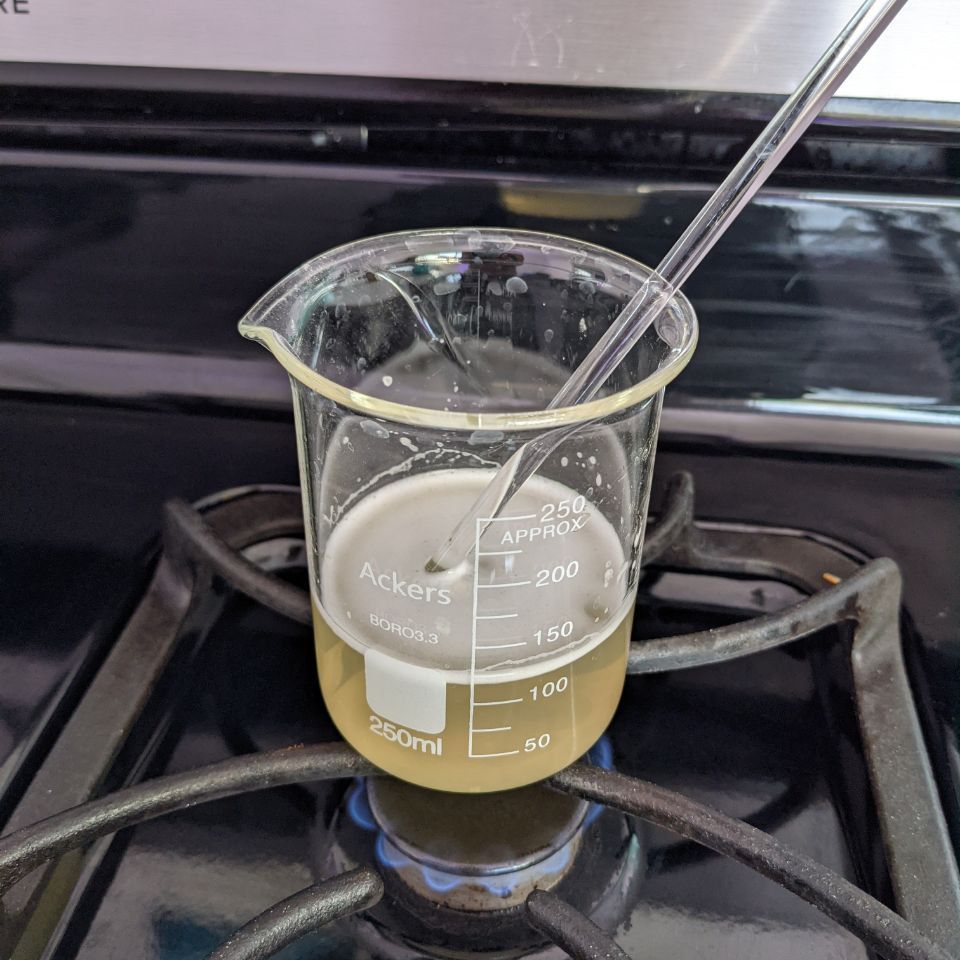 With a 250ml beaker, a gas stove and glass stirring rod, I combined the following;
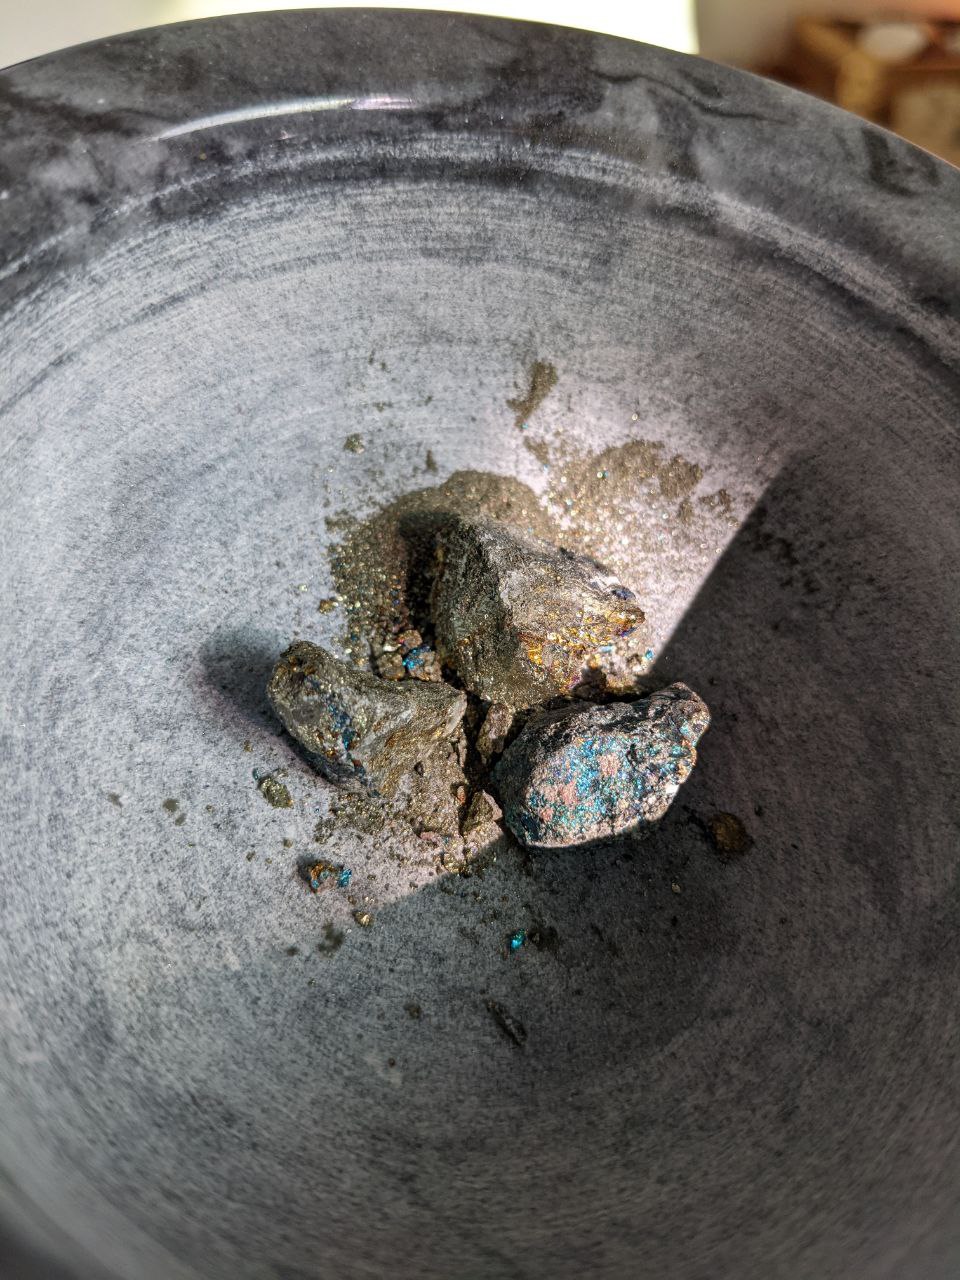
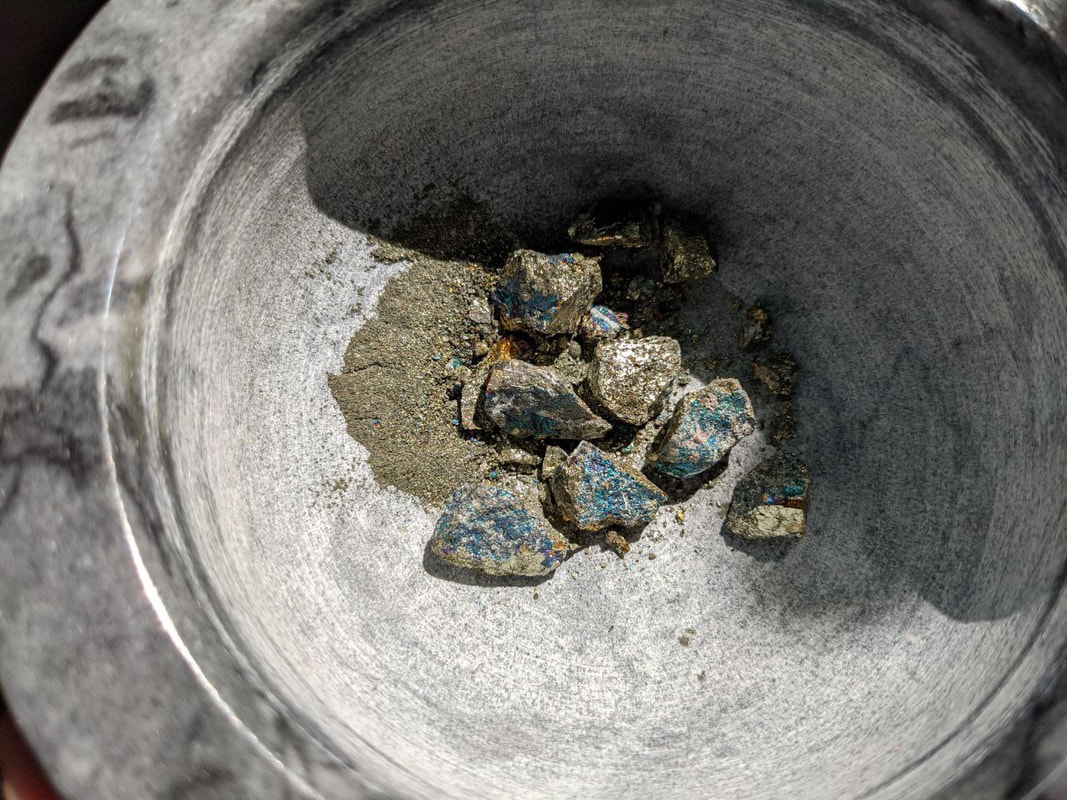
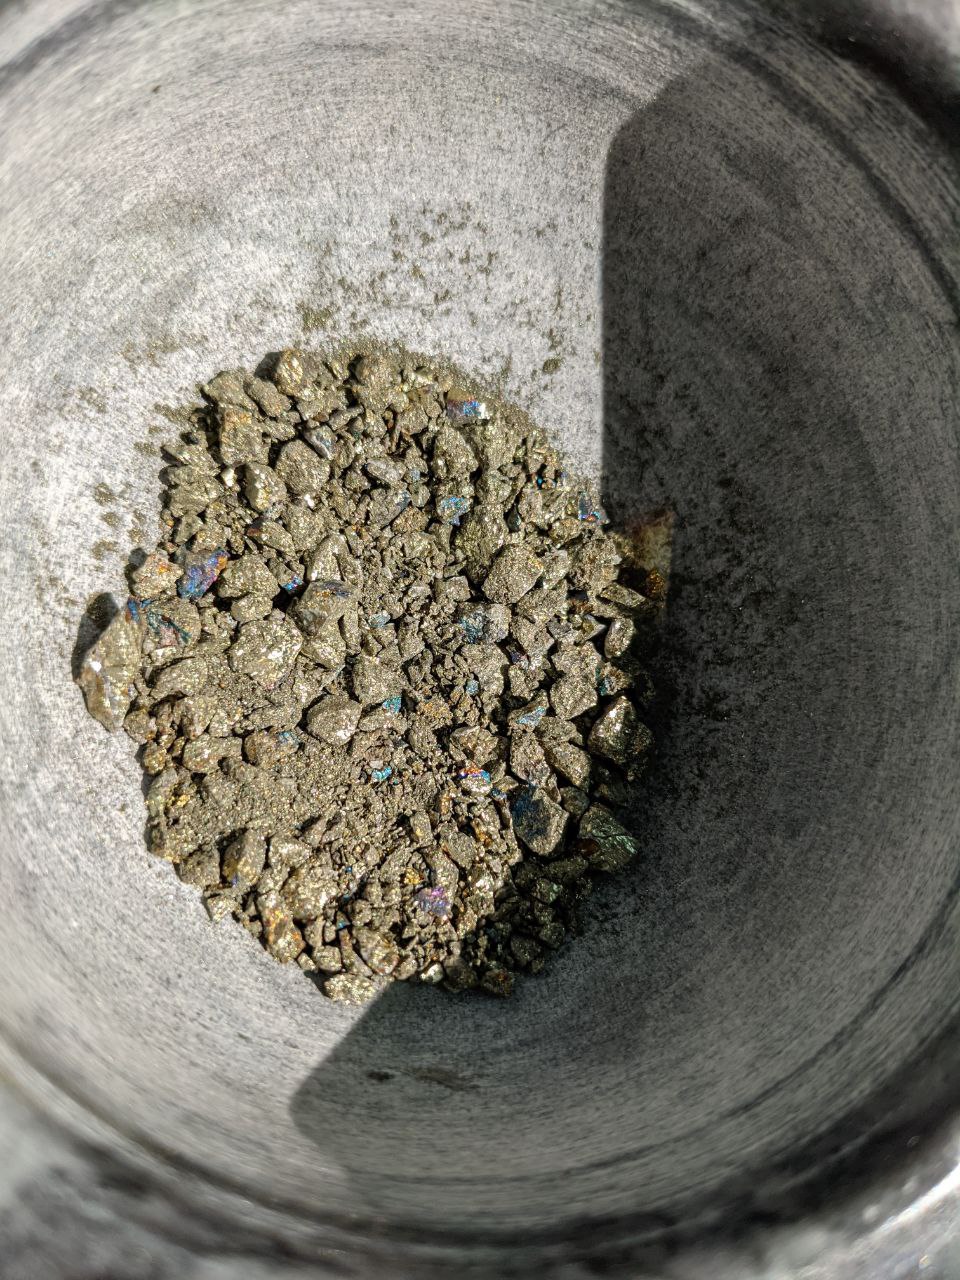
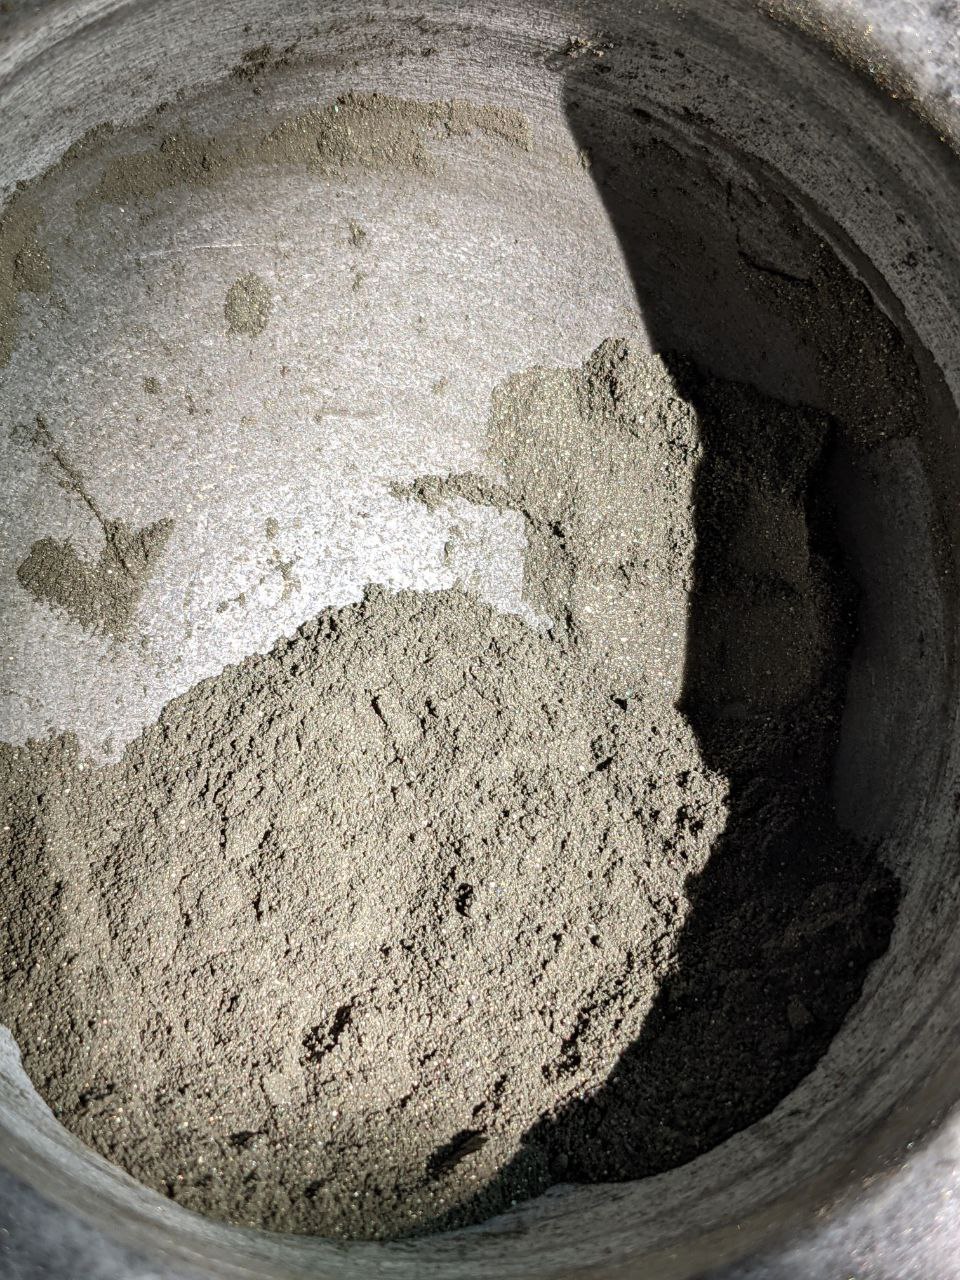
With this particular stone, I wore a particle filter mask and did this process outside, as your want to protect your lungs from any dust or debris that can (and will) result from breaking down. In a designated mortar and pestle, I firmly hammered down the stone, breaking it into smaller pieces. I continued this process until there were multiple smaller pieces, then moved in firm circular motions to further refine. This process takes a while, depending on your chosen material, which may protest more than not. Keep at it, working until you achieve the finest powder you can. It may help to parse off half or a third of the material, and work on the remainder at a time. The goal is to achieve a uniform, fine powder. Upon getting my pigment to a fluffy power, I piled it into a mound, using a palette knife to control the shape (set aside some pigment for now) . With the tip of the palette knife, I dug out a hole in the center, similar in the way a baker will hollow out a mound of flour to add into. Taking the now cooled binder, with a dropper, I slowly started adding it to the center of the mound, pushing the mixture around and into itself with my palette knife. The trick is to start with less, and add more as you go, up until you reach your desired consistency (I love buttery watercolors, so this is what I was aiming for). While I promise this happened, unfortunately I don`t have the images of me mulling the paint...regardless, with a muller on a slab of glass, apply even pressure, working in circular motions to fully blend your materials. Again, this takes time, enjoy the process and meditative motions of mulling, lulling you to your zen...or at least closer to your own, home-brewed paint. Once you reach a point where you are satisfied, grab a paint brush, and some water, it`s time to test out your work and fine-tune if need be. This is where you can also experiment with the ratios, potentially adding more of your set-aside pigment, or more binder. When you`re satisfied, scoop your paint into a pan...or, in my case, a shell since I didn`t have the foresight to acquire a designated pan for this.  Let you paint dry in the pan(shell) overnight before storing, but you can feel free to play around with it now! While I expected a blue/purple pigment, I ended up with a complex slate grey, with golden flecks that jump out in the lighting. For some fun science, Peacock Ore is a copper ore mineral, also known as Bornite. Due to it`s copper composition, the iridescent look increases as it tarnishes in the elements. My hope with my specific paint, is that it becomes reactive with it`s environment and evolves with time. 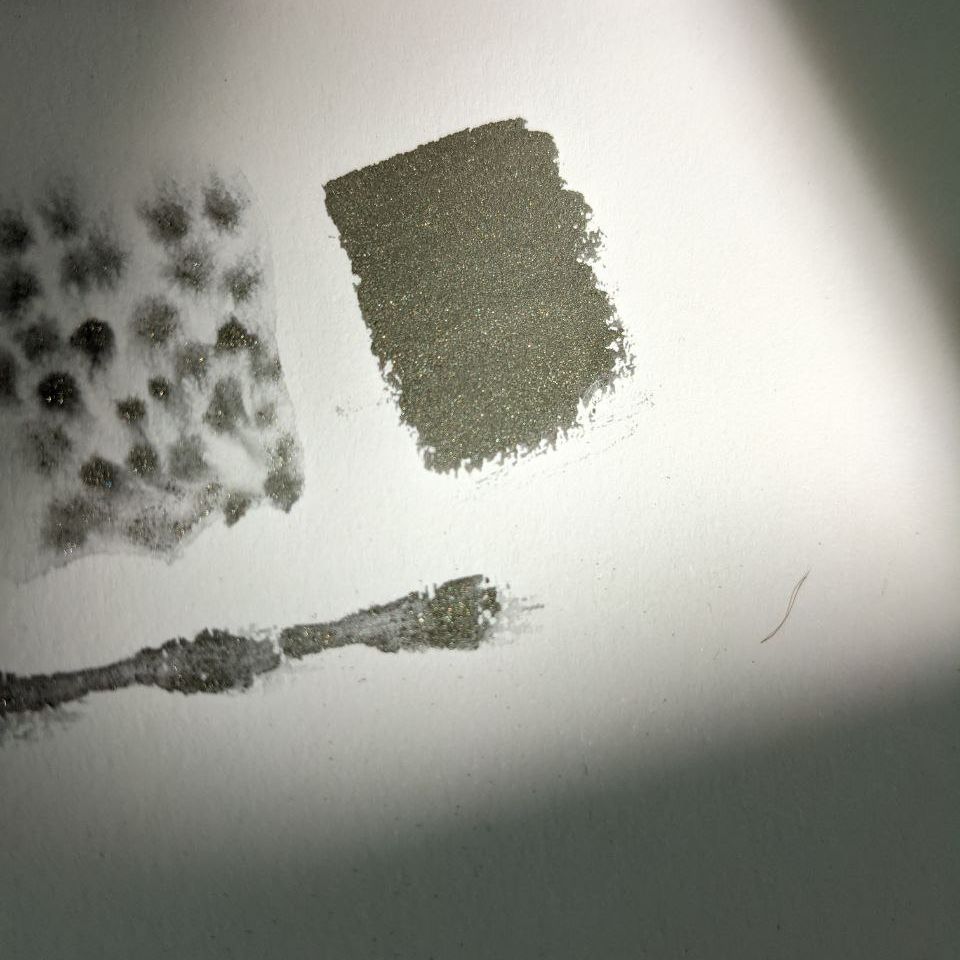 Below is a watercolor painting in which I used the Peacock Ore paint I`d made in the interlocking cholla wood branches. Hopefully, since I left this piece unsealed, the paint will tarnish and patina with time! 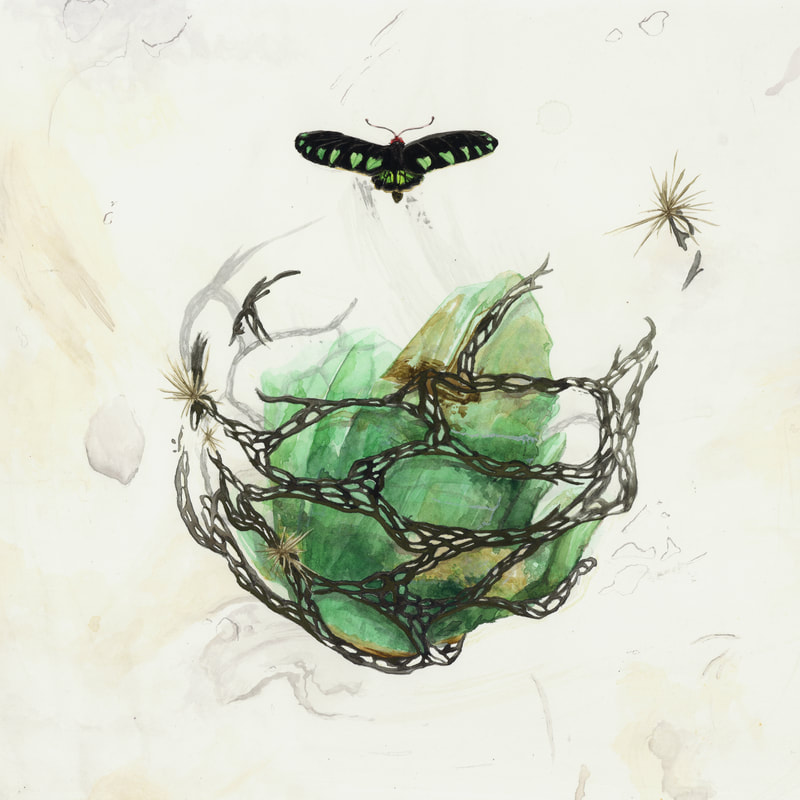 Materials Used:
0 Comments
|
Archives
September 2023
Categories |
 RSS Feed
Lost in the Woods
All Rights Reserved
©2023 Lost In The Woods (Ariana Bennardo)
©2023 Lost In The Woods (Ariana Bennardo)